Showing posts with label Baking. Show all posts

Wednesday, December 30, 2015

Dark Chocolate Pumpkin Oatmeal Muffins

Dark Chocolate Pumpkin Oatmeal Muffins


Why is it that we feel the need to only eat pumpkin in the fall. It's sooo good plus its healthy. I had a few cans in my cupboard and really wanted to use them especially since pumpkin doesn't last very long. So if you are like me and bought a few extra cans this fall this is a great recipe to help jump start your healthy goals this new year. I discovered that the shelf life of pumpkin is only about 6 months and I certainly am not going to waste it. My intentions was to make something for my husband so he could have a quick but healthy breakfast on the go or for him to bring as a snack. So I turned to my good old friend Pinterest to see what I could find. I came across many delicious looking recipes but many of them had ingredients in them that I just wasn't going to buy. I'm one of those people who wants something fairly healthy but I'm not a crazy healthy nut. I'm not going to buy ingredients that I may never use again like almond milk or coconut oil, especially since I don't like coconut at all. I came across this recipe and thought it had some great things about it but the few things that I didn't want to use I could easily replace with items I already have on hand. So with the help of my little one I got to baking. These were so quick and easy to throw together and are also pretty cheap. 


I bet most of you already have these ingredients in your fridge and pantry. I had just about everything besides the dark chocolate chips and I didn't have enough oats. I used my kitchen aid stand mixer and combined the pumpkin, egg, sugar, milk, honey, oil, vanilla, salt and spices. (The original recipe used just pumpkin spice but as I was making it I decided to use both pumpkin spice and cinnamon and nutmeg). I also used honey instead of maple syrup. I thought it would be healthier since it was less sugar added. I added a little bit of maple flavoring just to make up for it. 


After everything is combined add your oats and baking soda. Then add your chocolate chips. In the recipe I found they used mini semi sweet chocolate chips. I decided to use dark chocolate chips because they are better for you so why not right? I also doubled the recipe so I could freeze some. 


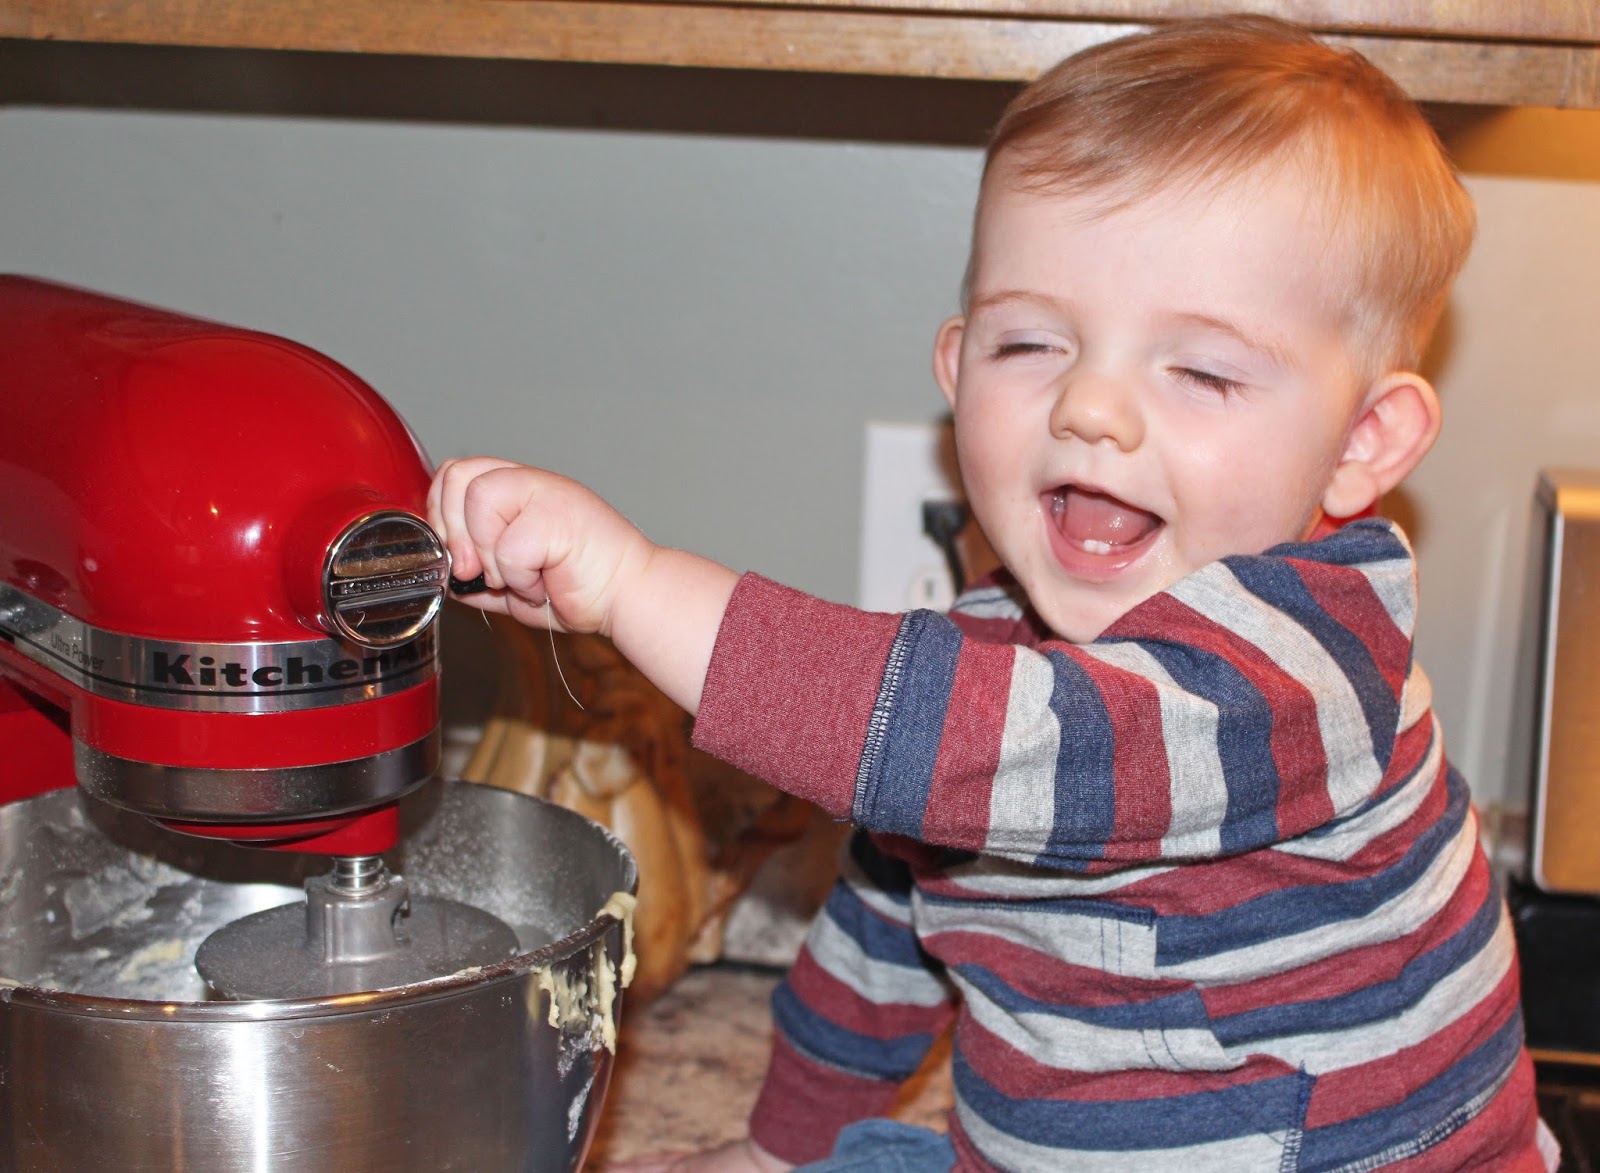
My little one loves to help although it was hard to keep those little fingers out of the bowl. He ended up with oil on his pants and a chocolaty face but hey he was happy so I was ok with it. 


I sprayed my pans with baking spray which has flour in it. I basically filled the cups up all the way since they aren't going to rise much. I was a little worried because the batter was very wet and lose since there isn't any flour but I had faith they would turn out. A single batch makes 11 muffins so I made 22 with my double batch. Whenever I have extra muffins spots that aren't filled I always put a little water in them. I think it helps bake things more evenly plus a little extra humidity in the oven never hurts when you are making things like muffins. 


Bake them at 350 degrees for 23 minutes or until they are golden brown and a tooth pick comes out clean. They should feel fairly firm to the touch. 


See how they didn't really rise so its important not to skimp when you are filling your tins. Let them cool for at least 15 or so minutes before taking them out or else they will just fall apart. Then cool them completely before storing them. For not having any flour or much sugar in them I thought these were really good. My son also really likes them which was just one more bonus since what mom doesn't struggle to come up with food ideas for their one year old. I hope my husband will also like them because I will definitely be using the rest of my pumpkin puree to make more. 


Dark Chocolate Chip Pumpkin Oatmeal Muffins

Ingredients:

1 large egg
1/2 cup pumpkin puree 
1/2 cup 1% milk (or your favorite milk like almond milk)
1/3 cup light brown sugar, packed
1/4 cup honey (or maple syrup)
1/4 cup canola or vegetable oil (you could probably use coconut oil)
2 tsp vanilla extract
1/4 tsp maple flavoring (if using honey instead of maple syrup, optional)
2 tsp pumpkin pie spice
pinch of salt (optional)
3 cups old fashioned oatmeal (don't use quick cook or instant)
2 tsp baking powder
1/2 cup dark chocolate chips 

Directions:

Preheat oven to 350 Degrees. Spray a non stick regular muffin tin with floured baking spray or grease and flour. (Paper liners would probably stick and tare the muffins apart)
In a large bowl add the first 10 ingredients (with the option of salt and maple flavoring) and whisk to combine (or use a stand mixer). Add the oats and baking powder and combine. Then add the chocolate chips and stir to combine. The dough will be lose and wet. 
Use a large cookie scoop or 1/4 cup measure to fill the muffin tins (use only 11 spots, don't skimp). They should be nearly full since the batter will not rise much.
Bake for 23 minutes. They should be golden and slightly firm to the touch. A tooth pick insterted in the middle should come out clean or with a few moist crumbs. Cool for 10-20 minutes before removing from pan. They will fall apart if removed to soon. Cool completely before storing . They will keep for 5 days at room temperature in an air tight container or up to 6  months in the freezer. 

* I made a double batch. I used 2 tsp of pumpkin pie spice, 1 tsp of cinnamon and 1 tsp of nutmeg 


Try Adding/Substituting:

Nuts
Soy Milk
Coconut Milk
Flax seeds
Dried fruit
Sugar free maple syrup
Sugar substitutes 

Saturday, December 12, 2015

The Best Rolls

Danielle's Favorite Rolls


Check out these beauties!! Boy of Boy do I LOVE bread, its one of my many contributors to my tummy squish. If you have read some of my past posts you have probably started to pick up on the fact that I get a lot of recipes or inspiration from my wonderful mother. I love her so much and have such fond memories of cooking with her. I can remember as a kid just begging to help her do anything I could in the kitchen. My siblings would be out playing but I wanted to be in the kitchen helping my mom. In many ways I am a lot like her but our love for food and cooking links us together. I often call her at work to get her opinion on how I should cook something or if a pairing of flavors sounds good or gross. One year my mom gave my sisters and I a cook book complied together by the woman at her church. I had used it a few times and found some pretty good things in it but it wasn't until a couple years later when I volunteered to make rolls for thanksgiving that I discovered my mom had put her roll recipe in the book. What was truly amazing to me was that she named the recipe "Danielle's Favorite Rolls". I must admit I got a little teary eyed when I discovered it. So the title alone will tell you how much I love these rolls and I love bread of all sorts whether its French, Italian, pumpkin, banana, garlic etc. If it's bread I'll eat it but who wouldn't right. I think one of the best smells in the world is fresh baked bread. Who's with me??
My mom has a fancy bread maker and throws all of her ingredients into it and lets the machine do all the work for her. I however am not that cool so I have to do it the slightly more tedious way but I have recently discovered that I really enjoy making bread especially the kneading it by hand part, it just makes me feel so accomplished and rustic. 
Start out by heating your milk and water in a small sauce pan along with your butter. You want to be very careful with this and watch it. You just want to scald it which means to just bring it to the point right before it boils. You will know when its there when it starts to steam and small bubbles start to form along the edge of the pan. The butter doesn't need to be melted, just softened. Remove it from the heat and let it slightly cool.


In a standing mixer combine yeast, sugar, salt and one cup of flour. Add your milk mixture and beat with a dough hook until its some what combined then add your eggs.

It will look something like this, my bowl was already a mess since this was my second batch of dough. 
With all this Holiday Baking I have been doing I had to get my little man involved. He quickly learned that it was fun to watch the beater go around and around and I think he just liked being involved. He would make noises the whole time the machine was on. I'm not sure if he was trying to mimic it or out do it, either way he is silly and I love him to pieces. And yes I was holding on to him so he wouldn't fall off the counter and I had to watch those cute little fingers very closely. It was better then him pulling himself up against my legs whining for me to pick him up. 


At this point start to add your flour one cup at a time. The amount you use will vary on where you live. Altitude always plays a part in baking which can sometimes make things frustrating. Once the dough pulls away from the edges and forms a ball its done and ready to knead by hand. Put a little flour out on a clean work surface and dump out your dough, it will obviously be a little sticky so get some flour on your hands to help out. It won't take much kneading just enough to get it to be smooth but it should have some elasticity to it. 


I always spray a bowl with cooking spray then place my dough inside so it doesn't stick to the bowl. You can cover it with a clean towel or cling wrap. Let it double in size. The time frame on this will depend on the warmth of your house. It took about an hour and a half for mine to rise. 

This is before it had risen

Pound down your raised dough with your fist just to deflate it a little. Form it into 12 balls, this is a technique that took me a little bit to master, my mom is a pro and she taught me her ways. You want them to be nice and smooth on top. Place them in a greased 9x13 pan and let them double in size again. Then bake at 375 degrees for 12 to 15 minutes. They should be golden in color and you always know when bread is done if it it sounds hollow when you tap on the tops with you knuckle. 


My mom always smeared a little butter on the tops when they came out of the oven to give them a nice shine. This is optional of course but um butter is delicious so why wouldn't you want to do that. These rolls are so amazing. They are thick and dense and are delicious with just butter or with jam or used to make a sandwich with. If you are a bread lover you won't be disappointed. Have patients making them, remember bread can be tricky especially if its your first time but practice makes perfect. 


Danielle's Favorite Rolls

4 1/2 cups All-purpose Flour
2 Eggs, beaten
1 c. Milk
1/4 cup water
1 Tbsp of yeast (about a package and a half) 
1/3 cup Sugar
1/3 cup Butter
1/2 tsp Salt 

Scald milk and water, add butter then let cool. In a a mixer combine yeast, salt, sugar and 1 cup of flour. Add milk mixture and beat until combined. Add beaten eggs. Mix in remaining flour 1 cup at a time until dough forms a ball. Knead on a flour surface until smooth and elastic. Put in a greased bowl and let rise; until doubled in size, about 1 hour. Shape into 12 rolls; let rise again. Bake at 375 degrees for 12 to 15 minutes until golden brown. 


Bread Machine Version

Warm milk in microwave for 60 seconds. Add Wet ingredients to your bread machine (use warm tap water). Next add your dry ingredients and set machine on the dough setting. Once the dough is done rising remove and shape into 12 balls. Place in greased 9x13 pan and rise again until doubled in size. Bake at 375 degrees for 12-15 minutes until golden brown.