Monday, December 14, 2015

Roasted Chicken

Roasted Chicken & Potatoes


I'm a big fan of chicken thighs or chicken quarters. Its dark meat so it's juicer and doesn't dry out as fast as chicken breast. I love nice hot chicken out of the oven with salt on it, YUM YUM. 

Chicken Thighs or Quarters are cheaper then breast 

I made a rub consisting of softened butter, pepper, seasoning salt, ground thyme, rosemary and paprika. This adds delicious flavor and makes the skin nice and crispy. My husband loves the skin, me not so much. You could use olive oil instead of butter and any of your favorite seasonings. 


Use your best tools, your hands, to rub this all over the chicken, under the skin, on top and the back. Place on a big baking sheet and put into a 375 degree oven and wait for your house to start smelling delicious. I cooked them for 45 minutes and they were perfectly golden and juicy. 


A few minutes before they were done I flipped them over so the tops could get basted in the buttery juices then flipped them right back over and finished cooking them. 


I served mine with roasted red potatoes and steamed carrots. I roasted my potatoes at the same temperature with some olive oil, seasoning salt, pepper and some bacon drippings I had hanging out in my fridge. I also used some italian seasoning from McCormick that comes in those grinders. It has hall sorts of delectable things in it like rosemary and garlic. It would be really tasty to take the drippings from the chicken, which there is a ton of, and make a gravy and make mashed potatoes. That's definitely what I will do next time. 


My house smelt so wonderful when this was finished cooking. Roasted chicken is one of those warm comfort meals. 

Roasted Chicken

Ingredients:


1 pkg Chicken leg quarters (5 pieces, or 8 thighs)
5 Tbsp Butter, softened
1/4 tsp black pepper
1/2 tsp seasoning salt
1/4 tsp thyme, ground
1/4 tsp paprika
1/2 tsp rosemary leaves (or ground)

Pre-heat oven to 375 degrees. Combine butter and seasonings in a small bowl. Rub all over chicken including under the skin. Place on a large baking sheet and roast for 45 minutes or until juices run clear.


Roasted Potatoes

Ingredients:

1 1/2 lbs Red Potatoes
2 Tbs olive oil
1 tsp seasoning salt
1/2 tsp black pepper 
(can add additional seasonings such as red pepper flakes, italian seasoning, rosemary, thyme, etc) 

Pre-heat oven to 375 degrees. Cut potatoes into quarters or halves depending on the size of the potato. Place on a baking sheet and drizzle with oil. Sprinkle with seasonings and roast for 35-40 minutes or until fork tender. 


Cream Cheese Roll Ups

 Cream Cheese Roll Ups
(Bacon Ranch & Mexican Green Chili)


I made these for a family Christmas party and everyone really liked them. I will apologize in advance that there aren't many pictures but in my haste to get them made so I could get my family out the door I forgot to take pictures as I went. They are so easy to make though that I trust anyone could do it.

Mexican Green Chili Ingredients 
Bacon Ranch Ingredients

I actually made two different versions, a Mexican Green Chili version and  Bacon Ranch. They were both really yummy but I think the Bacon Ranch ones were my favorite. 


Its as simple as mixing everything in a bowl, spreading it on a tortilla and cutting them into slices. Fast and Easy. 
These would be so easy to make with any of your favorite ingredients. Its just a matter of adding ingredients and flavors that are your favorite and pair well together. I bet you could even make a dessert version as well, maybe HA! Endless possibilities. 

Bacon Ranch Cream Cheese Roll Ups

Ingredients:

8 oz Cream Cheese  
8 oz Shredded Gouda (or your favorite cheese)
1 Pkg Hidden Valley Ranch Dressing Mix 
1 1/2 tsp Chives 
1 Lg can of Cooked Chicken, drained (12.5 oz or you can cook chicken yourself and shred it)
1 Pkg Hormel Peppered Bacon Bits 
3-4 Tortillas (Burrito Size) 

Soften cream cheese in the microwave for 30 seconds in a medium size bowl. Add the remaining ingredients except for the bacon and tortillas. Spread mixture onto tortilla covering the whole tortilla. Sprinkle the top with bacon and roll up. Cut off the edges to create a clean line then slice into 1/2 to 1 inch slices depending on how thick you want them. Enjoy!! 

Try Adding/Substituting:
Green Onions
Red Onions
Sliced Turkey
Lettuce
Tomatoes


Mexican Green Chili Roll Ups 

Ingredients:

8 oz Cream Cheese
8 oz Shredded Mexican Blend Cheese 
1 sm can diced green chili's 
1 Pkg Taco Seasoning 
2 Tbs Salsa 
3-4 Tortillas (Burrito Size)

Soften cream cheese in the microwave for 30 seconds in a medium size bowl. Add the remaining ingredients except for the tortillas.  Spread mixture onto tortilla covering the whole tortilla. Roll up and cut of edges to create a clean line then slice into 1/2 to 1 inch slices.


Try Adding/Substituting:
Olives
Tomatoes 
Onions 
Black Beans
Cilantro
Avacado
Hot Sauce 
Jalepenos


Saturday, December 12, 2015

The Best Rolls

Danielle's Favorite Rolls


Check out these beauties!! Boy of Boy do I LOVE bread, its one of my many contributors to my tummy squish. If you have read some of my past posts you have probably started to pick up on the fact that I get a lot of recipes or inspiration from my wonderful mother. I love her so much and have such fond memories of cooking with her. I can remember as a kid just begging to help her do anything I could in the kitchen. My siblings would be out playing but I wanted to be in the kitchen helping my mom. In many ways I am a lot like her but our love for food and cooking links us together. I often call her at work to get her opinion on how I should cook something or if a pairing of flavors sounds good or gross. One year my mom gave my sisters and I a cook book complied together by the woman at her church. I had used it a few times and found some pretty good things in it but it wasn't until a couple years later when I volunteered to make rolls for thanksgiving that I discovered my mom had put her roll recipe in the book. What was truly amazing to me was that she named the recipe "Danielle's Favorite Rolls". I must admit I got a little teary eyed when I discovered it. So the title alone will tell you how much I love these rolls and I love bread of all sorts whether its French, Italian, pumpkin, banana, garlic etc. If it's bread I'll eat it but who wouldn't right. I think one of the best smells in the world is fresh baked bread. Who's with me??
My mom has a fancy bread maker and throws all of her ingredients into it and lets the machine do all the work for her. I however am not that cool so I have to do it the slightly more tedious way but I have recently discovered that I really enjoy making bread especially the kneading it by hand part, it just makes me feel so accomplished and rustic. 
Start out by heating your milk and water in a small sauce pan along with your butter. You want to be very careful with this and watch it. You just want to scald it which means to just bring it to the point right before it boils. You will know when its there when it starts to steam and small bubbles start to form along the edge of the pan. The butter doesn't need to be melted, just softened. Remove it from the heat and let it slightly cool.


In a standing mixer combine yeast, sugar, salt and one cup of flour. Add your milk mixture and beat with a dough hook until its some what combined then add your eggs.

It will look something like this, my bowl was already a mess since this was my second batch of dough. 
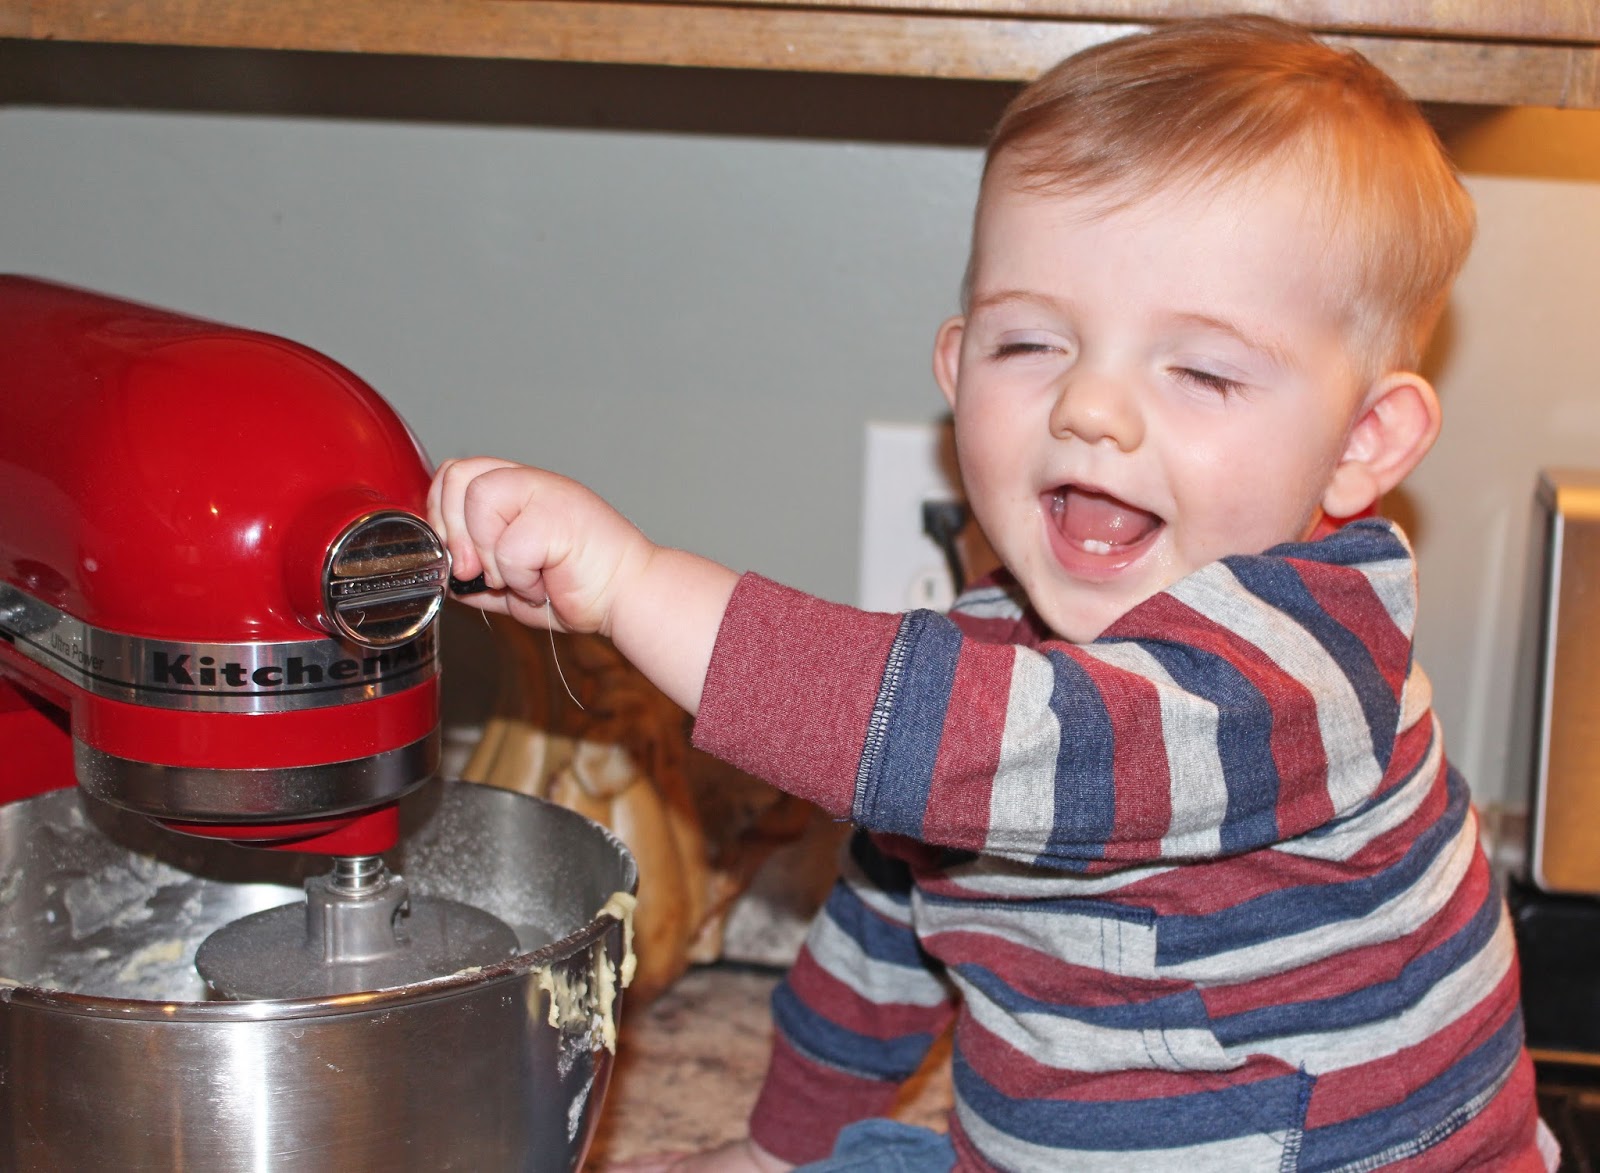
With all this Holiday Baking I have been doing I had to get my little man involved. He quickly learned that it was fun to watch the beater go around and around and I think he just liked being involved. He would make noises the whole time the machine was on. I'm not sure if he was trying to mimic it or out do it, either way he is silly and I love him to pieces. And yes I was holding on to him so he wouldn't fall off the counter and I had to watch those cute little fingers very closely. It was better then him pulling himself up against my legs whining for me to pick him up. 


At this point start to add your flour one cup at a time. The amount you use will vary on where you live. Altitude always plays a part in baking which can sometimes make things frustrating. Once the dough pulls away from the edges and forms a ball its done and ready to knead by hand. Put a little flour out on a clean work surface and dump out your dough, it will obviously be a little sticky so get some flour on your hands to help out. It won't take much kneading just enough to get it to be smooth but it should have some elasticity to it. 


I always spray a bowl with cooking spray then place my dough inside so it doesn't stick to the bowl. You can cover it with a clean towel or cling wrap. Let it double in size. The time frame on this will depend on the warmth of your house. It took about an hour and a half for mine to rise. 

This is before it had risen

Pound down your raised dough with your fist just to deflate it a little. Form it into 12 balls, this is a technique that took me a little bit to master, my mom is a pro and she taught me her ways. You want them to be nice and smooth on top. Place them in a greased 9x13 pan and let them double in size again. Then bake at 375 degrees for 12 to 15 minutes. They should be golden in color and you always know when bread is done if it it sounds hollow when you tap on the tops with you knuckle. 


My mom always smeared a little butter on the tops when they came out of the oven to give them a nice shine. This is optional of course but um butter is delicious so why wouldn't you want to do that. These rolls are so amazing. They are thick and dense and are delicious with just butter or with jam or used to make a sandwich with. If you are a bread lover you won't be disappointed. Have patients making them, remember bread can be tricky especially if its your first time but practice makes perfect. 


Danielle's Favorite Rolls

4 1/2 cups All-purpose Flour
2 Eggs, beaten
1 c. Milk
1/4 cup water
1 Tbsp of yeast (about a package and a half) 
1/3 cup Sugar
1/3 cup Butter
1/2 tsp Salt 

Scald milk and water, add butter then let cool. In a a mixer combine yeast, salt, sugar and 1 cup of flour. Add milk mixture and beat until combined. Add beaten eggs. Mix in remaining flour 1 cup at a time until dough forms a ball. Knead on a flour surface until smooth and elastic. Put in a greased bowl and let rise; until doubled in size, about 1 hour. Shape into 12 rolls; let rise again. Bake at 375 degrees for 12 to 15 minutes until golden brown. 


Bread Machine Version

Warm milk in microwave for 60 seconds. Add Wet ingredients to your bread machine (use warm tap water). Next add your dry ingredients and set machine on the dough setting. Once the dough is done rising remove and shape into 12 balls. Place in greased 9x13 pan and rise again until doubled in size. Bake at 375 degrees for 12-15 minutes until golden brown. 


Christmas Ornaments

Homemade Christmas Ornaments 


While at the mall participating in a youth church activity we decide to take pictures with Santa.  Our son wasn't thrilled or amazed by this odd man in a red suit but he wasn't upset by him either so we managed to get a decent picture even though he wasn't his normal smiling goofy self.  There was also no line to wait in so it was great.  Four wallet sized pictures came in the package we ordered.  I really wanted to make homemade ornaments with them to give to my mom and mother in-law. I saw something similar to this online but just wasn't exactly sure how to accomplish it so I consulted in my dear friend Margie. She gave me some pointers then I was on my own to experiment. I wanted to use the real picture but she knew mod podge would smear the photo so she suggested I get it photo copied. Let's be honest here,  that's way to much of an effort for me,  I wanted a quick and easy project.  So I took her suggestion of trying to just mod podge the back of it.

I started out with pre-cut wood from Hobby Lobby. They came in a pack of four which was perfect.  I decided to paint it gold and found some cute holiday embellishments to add to it. I sanded the wood first to make sure it was nice and smooth then wiped it off before I started painting. I did two coats of paint which was easy to do since it dried pretty quickly. Next I put a very thin layer of mod podge directly on to the wood where I wanted to place the picture.  I placed the picture on top and used a credit card to smooth it out. Margie's tip was to put a piece of parchment paper on top of the picture so I didn't scratch it while smoothing it out with the card. I let it completely dry then decided it needed a little pizzazz. I had a stash of glitter that I use when I shellac my nails and knew that was just what it needed.  I put mod podge on the area I wanted glittered then sprinkled away, tapping off the excess. If I were to do this project again I would do the glitter before the picture was put on and would spray it with some sort of finishing spray to ensure that the glitter stays intact for ever and ever.  Lastly I added my fun embellishment then had my hubby drill a hole near the top so I could add some gold rope thread so it can hang on the tree.
This project was cheap and easy and both mothers loved it.  I used red and green glitter, both turned out very cute.  The possibilities on this are endless.  You could do so many creative things with it.  Let your inner Martha Stewart take over your body.  Happy holidays!

Wednesday, December 9, 2015

Enchiritos

ENCHIRITOS

Some times you just want a simple meal that is cheap and will make everyone happy. This is one of those. It is a meal my mom makes and I have adapted to our liking. I'm not sure where she got the recipe though but I'm grateful she has it. My husband really enjoys these. As I was making them he came home from work and asked what I was making for dinner. I told him enchiritos, he replied with "OOO!! you haven't made those in a while". He was happy and that made me happy. As a woman I think we find pleasure in pleasing our men. 


I have experimented with the recipe a few times just to have fun and every time it turns out really good. This time I used ground pork, the recipe calls for ground beef. Here is the great thing about pork, its cheaper then beef and its healthier so why not use it. We often use ground chicken or ground turkey to substitute ground beef as well. Its good, try it. I minced up my onions super fine, gotta please the hubs, and sauteed it in a pan with a little oil and the ground pork. When my mom makes these she just cooks the meat then adds raw onions into the tortilla before she bakes them. We like ours cooked, so you decide which you would rather have, soft onions or crunchy ones. 


Once your meat is cook add your seasonings and the water. Here is another variation I do just because I think its a little easier, I mix my refried beans right into my meat mixture. The other option is to smear a spoonful onto your tortilla then top it with your meat mixture, it doesn't make a big difference just depends on what you would like to do. 


Warm up your tortillas in the microwave for a few seconds just so they are easier to work with and don't crack when you roll them. Put a heaping spoonful into the center of the tortilla then top with cheese. Roll them up however you like. This is how I do it, ends tucked in so nothing oozes out. 


Spray a 9x13 pan with cooking spray then place your rolled tortillas inside. It will depend how many you end up with on how full you make them and how much refried beans you use. I would say they make 6 to 8 so if they don't all fit in your pan use a bigger one if you have it or put the remaining ones in a 8x8 pan. Cover with your favorite enchilada sauce, I made mine from scratch and will add the recipe below. (Use as much sauce as you would like) Cover with foil and bake in a 375 degree oven for 20-30 minutes. 


Once warmed through remove the foil and top with cheese if desired. I used a Mexican cheese blend. I put it back in the oven for a few minutes just to melt the cheese. 

Top it with your favorite toppings like sour cream, green onions, cilantro, ranch dressing, black olives etc. I hope you enjoy these as much as we do and don't forget to get creative and make it your own. Enjoy!


Ingredients:

1 lb Ground Beef (or any other ground meat)
1 Medium Onion, chopped
1 Tbs Chili Powder
1/4 tsp Onion Powder
1/2 cup Water
1/4 cup Flour
1 tsp Salt
1/2 tsp Garlic Powder
1/2 tsp Paprika
Dash of Red Chili Flakes (optional)
Refried Beans
6-8 Tortillas (Burrito size)
Enchilada Sauce
2 1/2 cups Shredded Cheese (Cheddar or Mexican Blend etc)
Favorite Toppings

Instructions:

Preheat oven to 375.
In a skillet or dutch oven brown your beef in a little oil, add your onion and cook through. Add (chili flakes) flour, chili powder, salt, onion powder, paprika, garlic powder and water. Stir to incorporate. 
Warm Tortillas 
Spoon refried beans onto tortilla. Top with beef mixture and if desired cheese. 
Fold tortillas and place in sprayed 9x13 pan. Pour desired amount of enchilada sauce on top then cover with foil. Bake in the oven for 20-30 minutes to warm through. Remove foil and top with cheese. Place back in oven and bake until cheese is melted. Top with your favorite toppings such as olives, sour cream and green onions. 

6-8 Servings


I found this recipe on Pinterest and really enjoy it, its so much better then the canned stuff and its really easy to make and you probably already have everything on hand. 
yield: ABOUT 2 1/2 CUPS

prep time: 15 MIN

cook time: 20 MIN

ENCHILADA SAUCE

INGREDIENTS:

1/4 cup vegetable or canola oil
2 Tablespoons all-purpose flour
2 Tablespoons chili powder
1 (8 ounce) can tomato sauce
1 1/2 cups low-sodium chicken broth
1/2 teaspoon ground cumin
1/2 teaspoon garlic powder
1/2 teaspoon onion salt
1/4 teaspoon salt

DIRECTIONS:


1. Heat oil in a large skillet to medium heat. Whisk in flour and chili powder. Reduce heat to medium and continue to whisk until lightly browned. Gradually whisk in tomato sauce, chicken broth, cumin, garlic powder, onion salt and salt. Stir until smooth, and continue simmering over medium heat about 10 minutes, or until slightly thickened.
2. Serve immediately, or keep in a covered bowl in the refrigerator for up to 3 days